Hilarious video of our 2014 road trip to 22 states and 15 national parks...


RV Eternabond Installation Guide
If you are tired of replacing or applying lap sealant on your roof every year or so, you should consider Eternabond Roof Seal. It comes in a wide variety of sizes but the most common are the 4" x 50' roll and the 6" x 50' roll. To do the installation properly, you will also need a 2" Stainless Steel Roller, Acetone or similar cleaner, a small razor blade and a rag or two.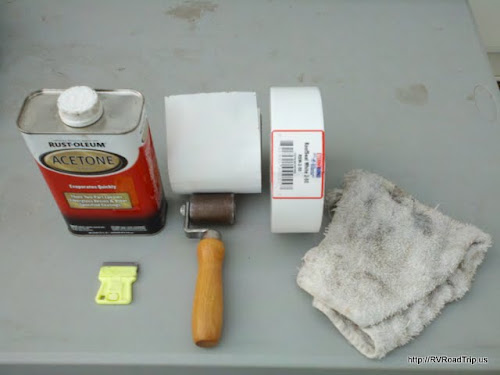
If you are planning to remove the old lap sealant before putting down the Eternabond, you can use a gasket scraper or rounded edge putty knife to get it up. It is not necessary to remove the old lap sealant as the Eternabond can be placed right over it.
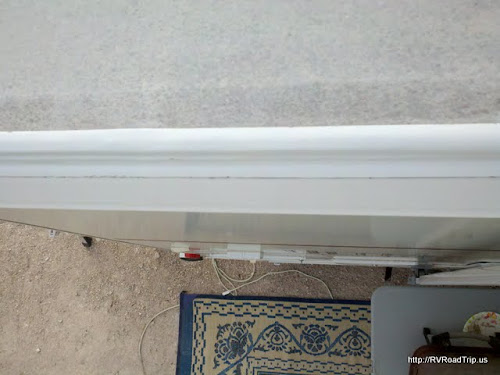
Here is what my roof edges looked like before I started. The view is from the roof looking over the edge of the camper. The dark line you see is the old caulk that was cracking. The bright white strip is the RainKap that was installed earlier. The Eternabond will be placed so that it covers the roof edge and also overlaps the RainKap creating a water tight seal.

Take a dry rag and remove any loose debris from the area. Now use a damp rage to get rid of any dirt. Let the area dry for at least 30 minutes. Now use a clean rag and dab some acetone on it and thoroughly clean the area where the Eternabond will be applied. Do NOT pour the acetone on the roof, put the rag over the can opening then tilt the can to get some acetone on the rag. Wipe the area well but don't over do it. The acetone will dry almost immediately after you wipe it on.
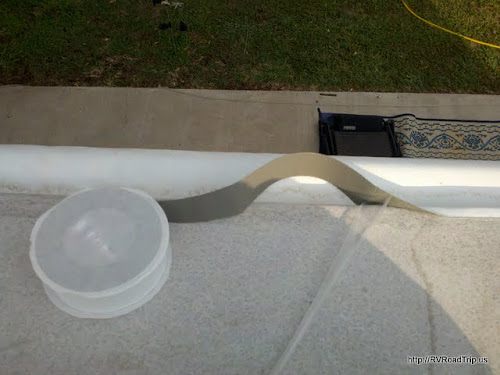
Peel back the clear liner from the gray side of the Eternabond about 10" and press the end into place. Gradually pull the liner to expose the adhesive and press the Eternabond into place as you go. Do not try to do long strips, just do about 12"-24" increments, peeling back the liner as you go along. If you try to remove the liner all at once, you will have serious trouble controlling the tape and where it sticks.
The following picture shows this in progress. This is looking down over the main awning. The Eternabond is not being applied in a way that it would interfere with the awning operation or removal of the awning fabric. If you look closely, you can see the area cleaned with the acetone, it is darker than the rest of the roof.
After you have about 4' of tape in place, use the steel roller on it to activate the micro-sealant beads. The more you press on the Eternabond with the roller the better the adhesion. Make sure you get the edges of the tape as well as the middle. If you get a bubble, lance it with a pin and roll that area again. The Eternabond will reseal the pinhole you just made. If you get a "tent", cut the tent and fold the sides over one at a time, then place another small piece of Eternabond over the tent and press it well with the roller.
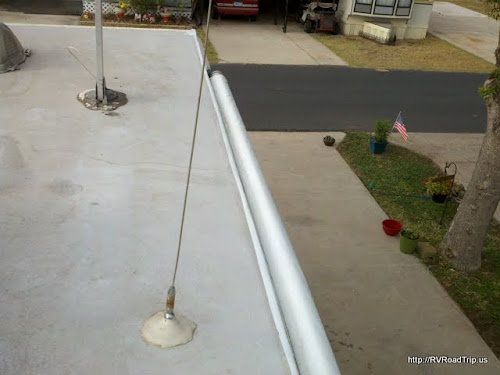
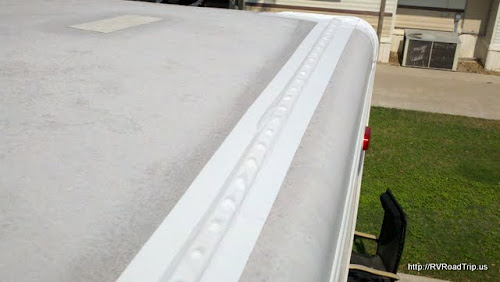
Once you have pressed the Eternabond in place, you are done. The seal is effective immediately and it won't matter if the roof gets wet. The adhesion will strengthen more over time but the seal is immediate. Here's what it looks like when done.
Total installation time was about 2 ½ hours.