Hilarious video of our 2014 road trip to 22 states and 15 national parks...


Ram ProMaster RV Camper Van Conversion - Electricity
This is the original conversion we did. If you are looking for the index page of this project, click here. If you want to see the new build, click here.Must... have... more.... Power!
We did not wish to utilize the 12v circuitry that the van originally came with as it draws power from the starting battery. We didn't want to ever run the risk of not being able to crank the van because we ran the lights or fans too long. For this reason, we installed a new, completely isolated 12v system. We initially installed a pair of Duracell GC2 6v batteries wired in series to provide 12v. In our opinion, a pair of 6v deep cycle batteries will provide more amp hours than a single 12v deep cycle battery. Yes, there are some 12v batteries with higher amp hour ratings, but they cost more than we were willing to spend. If one pair turns out to not be sufficient, we will add another pair of batteries later.
We did not have any old batteries to trade in, so we ended up paying an $18 core charge per battery. Ouch! We purchased the batteries at our local Sam's Club as they are the cheapest and if we ever need to use the warranty, they are located in just about every major city. At this point we have run the wire for our 12v needs. We have a run down the center of the van on the ceiling for overhead lights, a run to the MaxxFan, a run over each bed for personal lights and fans, a place in the driver's side bed frame for voltage readout, cell phone charging, etc. Wiring had to be done early because it needed to be fished through before we stuffed all the crevices with insulation.
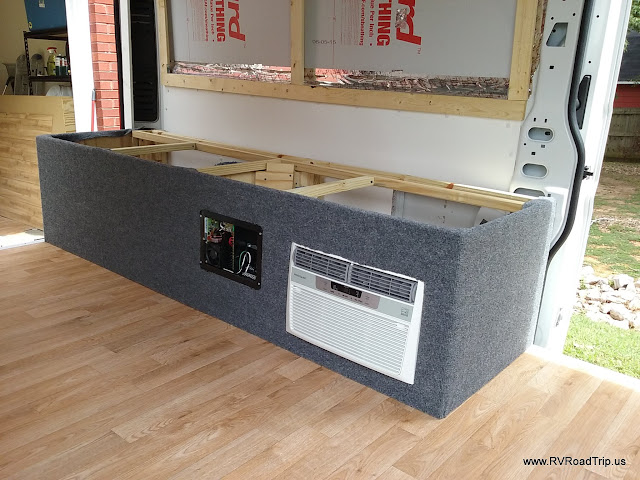
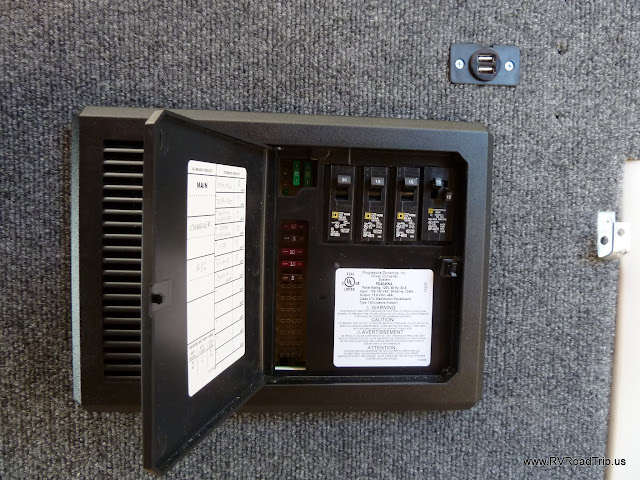
For our electrical distribution needs, we installed a Progressive Dynamics PD4045 converter. It is a 3 stage, smart battery charger, provides circuits for the air conditioner, fridge and anything else we want to plug in, and also provides the 12v power when we are plugged in at a campground. We have a 30A main breaker, a 15A breaker for the A/C and another 15A breaker for another 110v circuit. Each 12v run is individually fused. Here is a picture of the converter and A/C installed in the driver's side bed frame.
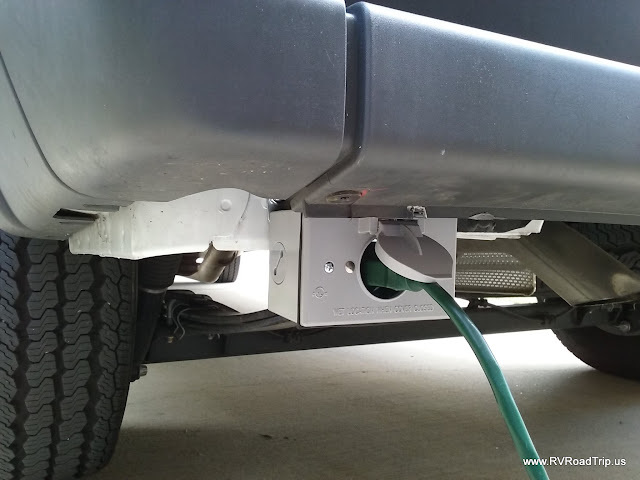
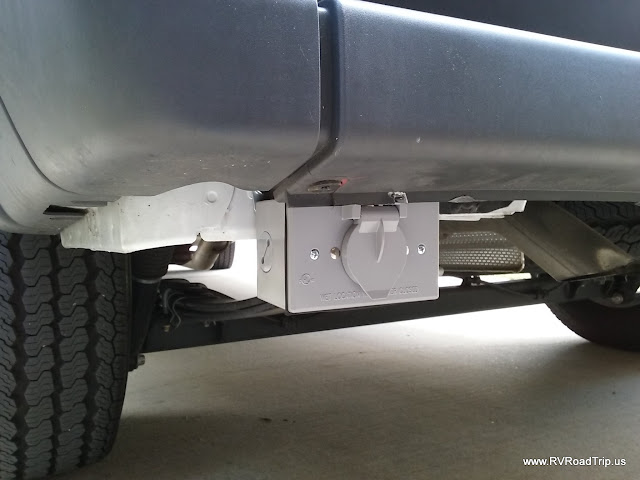
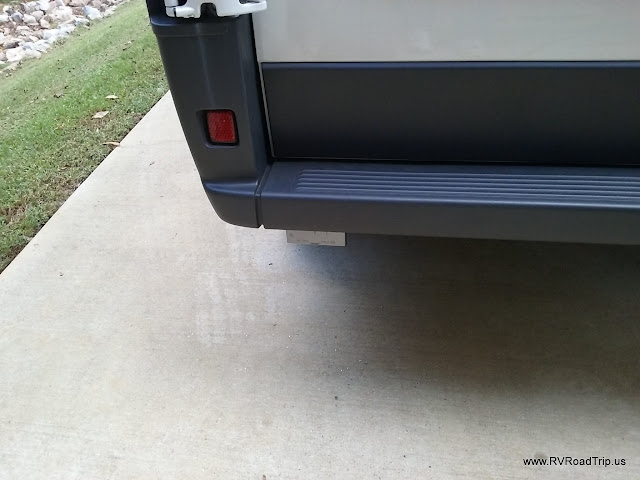
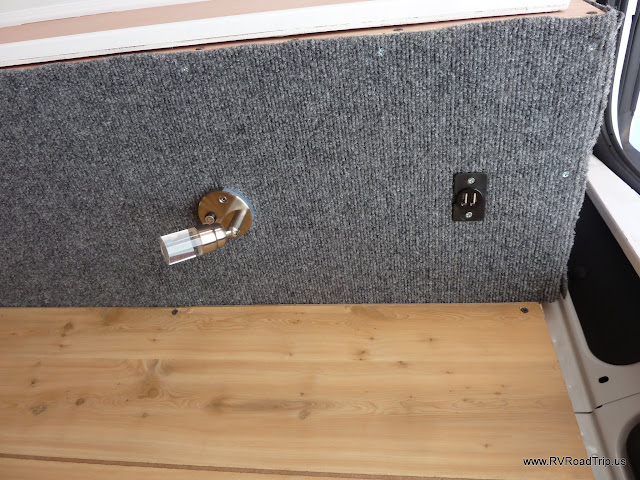
To connect to shore power, we have a 15A inlet located just below the left rear bumper. We can plug an extension cord into this and it powers the converter, battery charger, all our 12V circuits and the air conditioner. Below are images of the 110v inlet showing it plugged in to shore power, disconnected and what it looks like from a normal point of view.
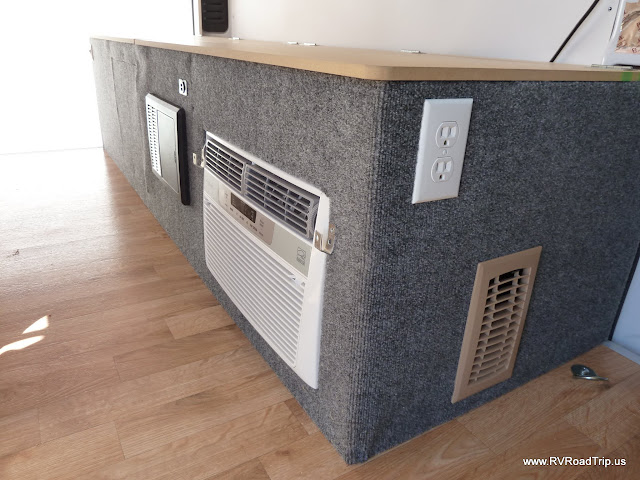
Unfortunately, all the electrical stuff is hidden in the walls and other framing, so you can't really see it. I guess we could tell you where we ran all the wires but that would be pretty boring. Hooking up the power distribution box is the biggest step, but it is really easy to do. The instructions the unit came with helped a great deal. You just need to buy a big pack of various sized fuses. Below are some pictures of the things we ran power to, such as reading lights and USB ports over each bed, overhead lights, MaxxFan, A/C and a 110v outlet.
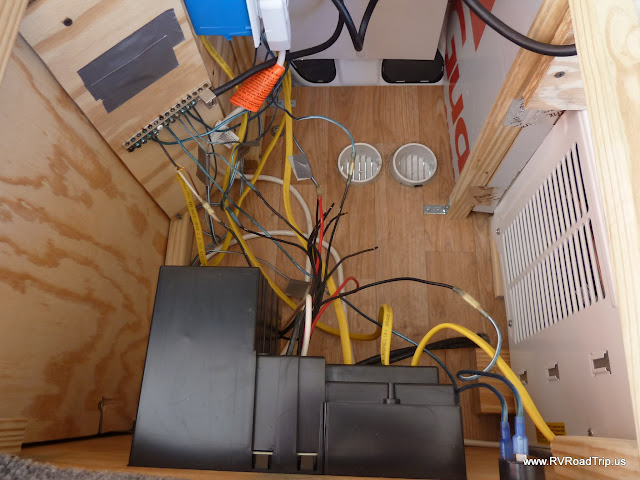
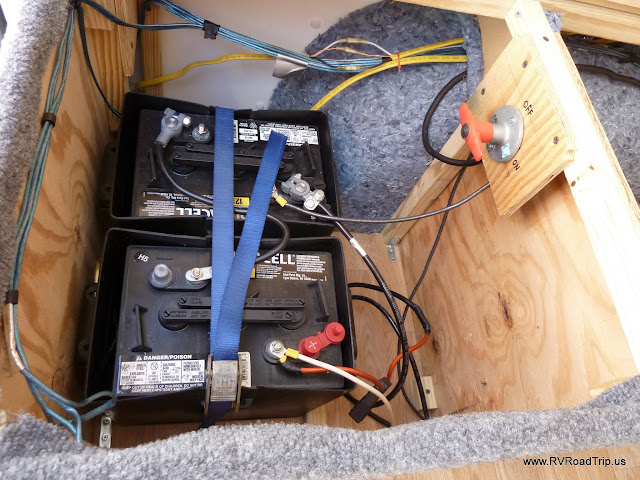
The image above is our batteries. It is a pair of 6v GC2 golf cart batteries, true deep cycle. You do not want marine or starting batteries as they will not provide nearly as many amp hours. Visit this page to learn about and understand RV 12v systems. The white wire runs to the battery charger (which is also the power distribution box) and the orangish wire goes to the wheelchair lift. The thick black wire to the battery is from the wheelchair lift, the smaller 10 gauge wire goes to the charger. I have the on/off switch in case I need to disconnect the batteries from everything else for some reason. The batteries are in plastic battery boxes to catch any potential acid spillage, and the batteries are strapped down to hopefully keep them in place in the event of a crash. The blue wires you see are 12v DC lines and yellow is 110v AC lines.
Wiring a conversion van is something that anyone can do. It just takes a little patience and a little time. Plan out what your needs are beforehand then put that plan into action. You'll end up with a great setup and a van ready for campground use or boondocking. We're not professionals and do not claim to be, so please read the disclaimer by clicking the link in the page footer.