Hilarious video of our 2014 road trip to 22 states and 15 national parks...


Ram ProMaster RV Camper Van Conversion - Insulation and Flooring
If you are looking for the index page of the campervan project, click here.Wall Insulation
The van came without anything other than paint on the interior walls and because of this, the back of the van gets extremely hot in the summer and extremely cold in the winter. Insulation is a must. We did a ton of research on this and found everyone has their own opinion on what to use and how to do it. We saw lots of people using FatMat or Noico products for sound deadening, then adding Reflectix on top of that. Some people went with EZ Cool and some people even put household fiberglass insulation in their van (the pink stuff). We saw instances where people used spray foam insulation but holy cow, that stuff gets everywhere and we were worried it might squeak as the body of the van flexes. Basically, if Home Depot or Lowes carries it, somebody out there tried to use it in their van.
Not saying any way is wrong or one is better than another, but we opted to go with UltraTouch Denim Insulation. We got ours from Home Depot. (Let us know if this Home Depot link goes bad. They are notorious for changing their links.) You have to order it online, it is not sold in the stores. The UltraTouch insulation is a lightweight, foil-faced, fire-retardant blanket-type insulation with multiple uses. The stuff that makes it fire retardant also makes it resistant to mold and mildew. The radiant barrier is made from recycled natural fibers and provides excellent thermal and acoustical insulation, reflecting up to 97% of radiant energy for excellent savings on heating and cooling costs. A bonus is that is will not make you itch!
The insulation is held in place using 3M 90 Spray Adhesive. Don't use 3M 77 as it is not a permanent adhesive, get the 90! You want the adhesive to last since you won't be able to get back into your wall to rehang fallen insulation! We bought a big enough roll (48" x 75') of this insulation so we could cover every nook and cranny in the van from floor to ceiling.
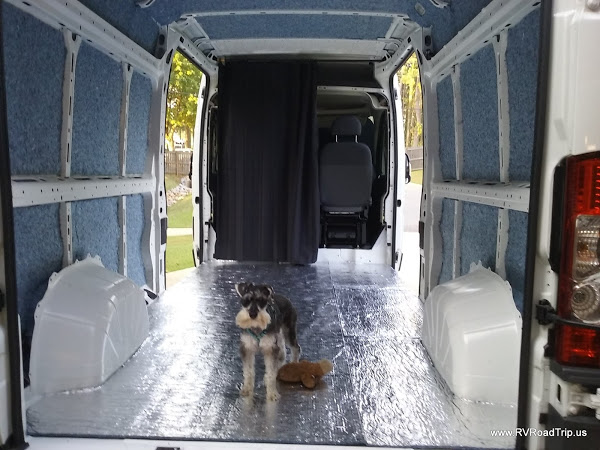
If you look at the picture above you will see that we have completed a good portion of the initial insulation. In the larger sections, we also added a 1/2" layer of polyiso insulation. We figured that because this area was so large, an extra layer of insulation couldn't hurt. We also found out that the exposed wall framing still gets very hot when the van is in the sun. Now that we have completed all of the wall insulation, it makes a tremendous difference. Before we cover the walls and ceiling with hardboard panels, we will put in a layer of Reflectix. We will stay nice and cool in the summer and toasty warm in the winter!
Flooring
We put down a layer of 4 mil plastic sheeting and a layer of the Ultratouch insulation on the floor and installed the plywood base. The insulation is shiny side up on the floor as we don't anticipate the sun shining on the van from underneath, thus the radiant barrier isn't needed. We're hoping that the radiant barrier facing up will help keep the interior temperature more consistent regardless of the weather conditions. Here is a video explaining the type of insulation we are using, where we got it and how we plan to use it.
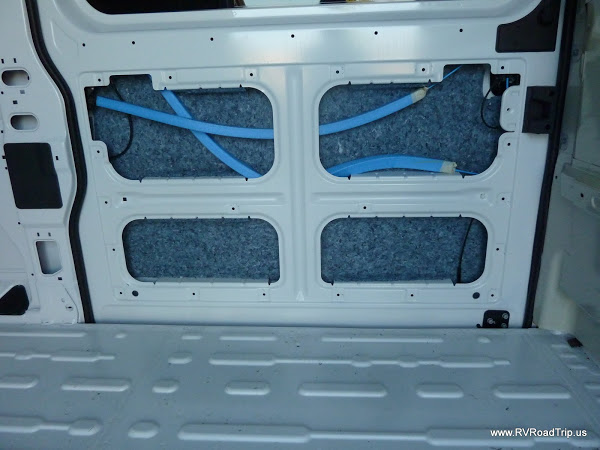
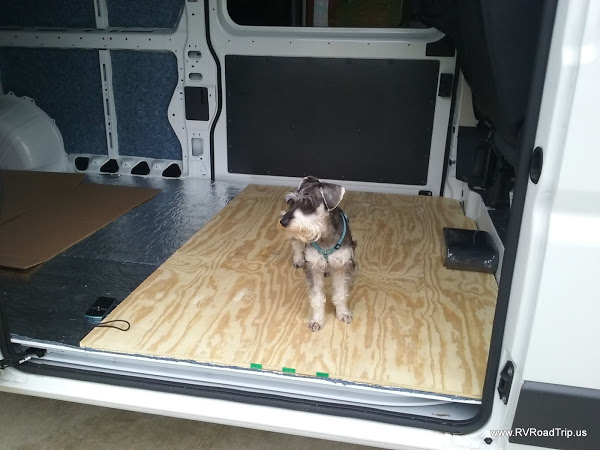
We used 3 sheets of 1/2" B-C grade plywood and put them in from side to side instead of front to back. This way we ended up with 3 large pieces instead of a patchwork job to cover the entire floor. We used cardboard to create edge templates so we could use a jigsaw and cut it all to fit just right. We ran the 120v wiring from one side of the van to the other under the flooring. It is much shorter to go under the floor than route it up the wall, over the ceiling then back down the other wall. We took a handful of short videos during the installation process and edited them all together for you. And here it is...
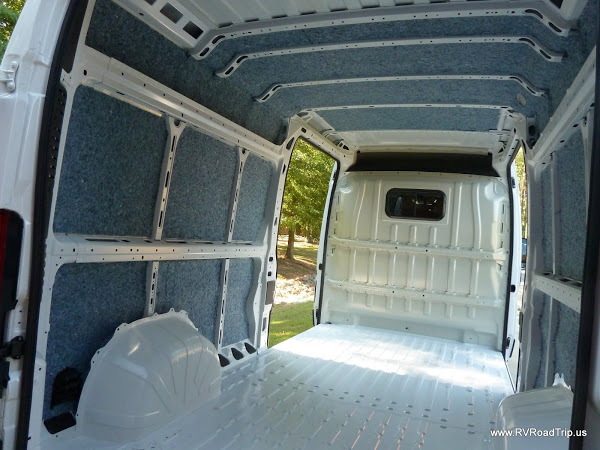
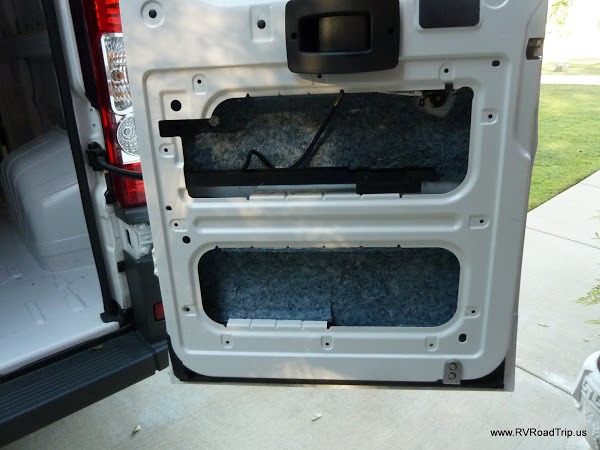
Here are some of the still images we took during this process. You may notice that we removed the bulkhead and replaced it with a curtain so we could get from the seats to the back of the van without going outside. This is a must when transferring from the wheelchair to the front seats. The final part of the flooring was installing the vinyl covering. We didn't have the necessary tools to install laminate flooring and we really didn't think we could do it and have it look decent. Scroll down through these pictures and check out our handywork! :)
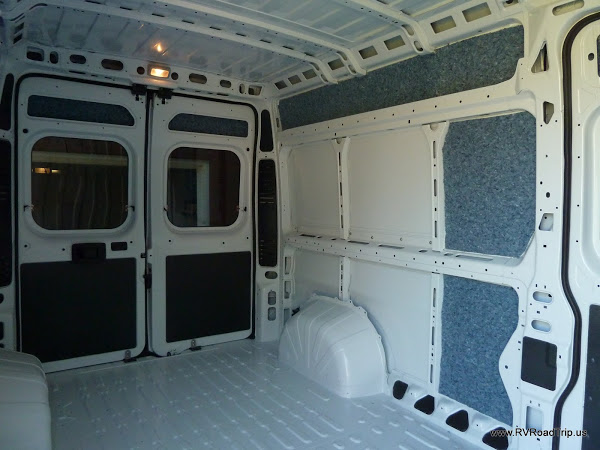

Because we had so many holes in the floor after removing the original bed frames and wheelchair lift, we decided to replace the vinyl flooring. We went with a little darker tone this time. Here is a shot of it in direct sunlight. The only drawback to a darker floor is that it shows debris more easily.
