Hilarious video of our 2014 road trip to 22 states and 15 national parks...


Ram ProMaster RV Camper Van Conversion - Air Conditioner
This is the original conversion we did. If you are looking for the index page of this project, click here. If you want to see the new build, click here.DIY Campervan Window Unit Air Conditioner Installation
Most RVs come with a roof mounted A/C unit and they work very well. However, they are expensive to buy (about $1000.00), expensive to install and expensive to repair... so we opted to go a different route with our van conversion. We visited our local hardware store and picked up a 6000 BTU window unit AC that included a remote control. Now before you jump to conclusions, we never had any plan for the air conditioner to be visible from the outside. We built the bed frame specifically to house the A/C on one end and then vent it to the outside as inconspicuously as possible.
The A/C we bought is a Frigidaire FFRE0633Q1 model. It is powerful enough to cool the van yet small enough to fit where we wanted it to go. Another big advantage is that is only costs around $200 delivered, and it can be replaced for what a roof top unit would cost to repair. And better still, you can get one almost anywhere whereas you are limited to camping stores for a roof top model. These small window units are notoriously reliable and can run for years and years thus making them an even better value overall.
Our first step was to build the framing to hold the A/C in place so it didn't jiggle or move while the van was being driven. We mounted the A/C to a piece of 2x4 then bolted that 2x4 to the van floor. The A/C is slightly tilted to the back so the condensation will drain properly. You don't want a leak inside the van! This unit had no drain tube, instead it pooled the condensation so that the fan would spray it across the coils making it more efficient. There was only an overflow hole in case the water level got too high and this would have simply spilled it over into the van. We sealed up every hole on the bottom of the A/C and drilled a hole for a drain tube at the back of the unit. We used a semi flexible rubber hose to go from that hole through a hole we drilled in the van floor. We generously applied sealant around the drain tube so there is no way it can ever leak. Here is a shot of the drain tube.
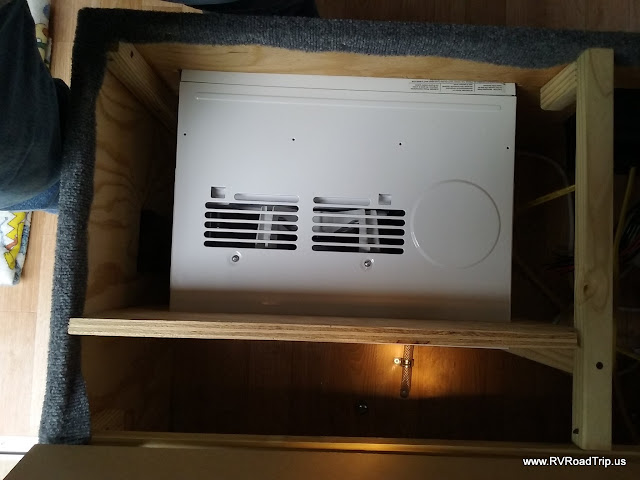
Step two was to provide vents where fresh air can be drawn in. The fresh air vents are a pair of 3" holes cut into the floor of the van as well as a 9" vent cut into the side of the A/C cabinet. If this turns out to be insufficient fresh air intake, we will build in more vents but for now it looks as if this will be good to go. In the image below, you can see one of the floor vents.

The final step, we needed to build a duct for the exhaust to go outside. We originally planned to use tin ducting but that proved to be more trouble than it was worth. We ended up using a polyiso material with a radiant barrier and sealing it up with FlexFix tape. Cutting the angles was the hardest part for us, but we got it done. We had to cut a hole into the side of the van and run the ducting to it, then install a suitable vent cover on the outside. The way the framing is built on the van wall, we were limited to to a 12" square hole. The only vent cover we could find that size was in the UK. Yes, the United Kingdom. Here in Alabama, we just call that "overseas". The vent was $13 and shipping was $23... but it is what we wanted and needed.
We got the ducting made, sealed and routed to the hole in the wall the of the van. We attached the vent cover and sealed it up using butyl tape and caulking. We gave it all time to dry then fired up the A/C using the remote. Ahhh, nice cold air came blasting out and after about 15 minutes, there was a steady stream of water coming out of the drain tube. Yay, it worked as intended! Here are the pictures we took during the installation.
These are the tools we used to cut the hole into the side wall of the van.

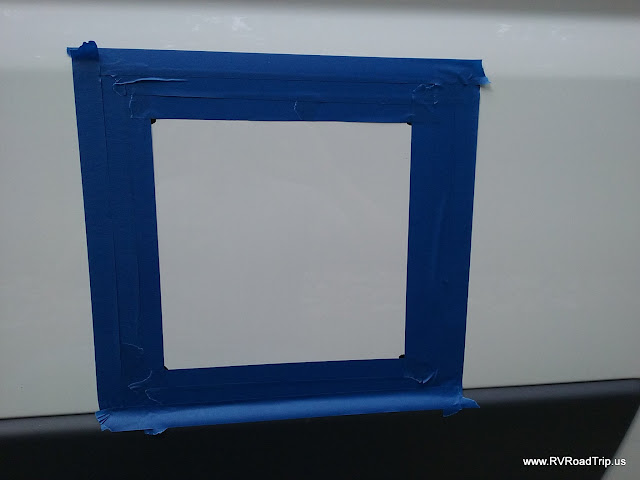
We marked the location from the inside and drilled holes at each corner just big enough for the jigsaw blade.

We used painters tape to prevent the jigsaw foot from scuffing the side of the van.
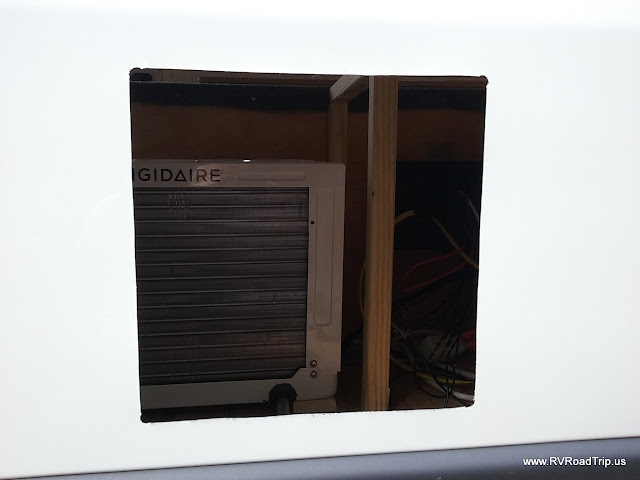
The hole is cut and you can see the A/C on the inside.

The painters tape was removed. We then painted the fresh cut edges with primer to prevent rust.
The ductwork built, routing the exhaust from the A/C to the new vent hole.
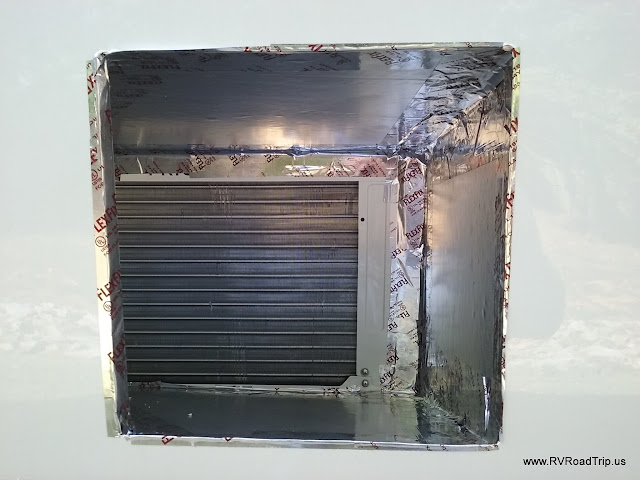
Another angle of the duct.

The finished project from the outside.

Another view of the finished project from the outside.

Electricity to run the A/C is provided through a converter. You can read about that on this page. We have a deflector that mounts in front of the A/C vent when it is on and it points the cold air upwards.
UPDATE: The A/C setup documented on this page was not sufficient to keep the van cool during hot days, direct sun or not. However, it was fantastic when the sun went down so if you only need A/C at night, this will work for you. We decided to put in a 14000 BTU Portable Air Conditioner and you can read about it on this page.