Hilarious video of our 2014 road trip to 22 states and 15 national parks...


RV Low Profile Satellite Dish Stand
Many of us have satellite service with DirecTV or Dish Network and use a portable dish. A common problem is placing the stand in a position where you can receive a signal and securing it so the wind won't tip it over. We need a lightweight, rugged and sturdy stand that we can easily transport and store. And let's not forget that we need to make sure it is level, find North and point the dish to the right azimuth. We found a way to make this process very easy!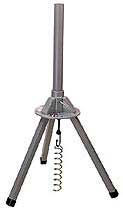 First thing we did was purchase the Winegard TR-2000 Tripod Antenna Mount. This mount has a level, compass and azimuth indicators built in, however it is not a very stable platform. The legs on it a just too shaky and the height makes it top heavy when you have your dish attached to it. Now that you have this mount, go ahead and remove the legs. Simply push in the spring pins on each leg and slide them out. You'll be left with just the base and the pole your dish attaches to. You will not need the bungee or the set-screw that came with the tripod.
The steel pole that your dish attaches to is a little too long for our needs. Using a common hacksaw, cut off 7" of the pipe. Be sure to sand and paint any rough edges after you cut the pipe. When you replace the pipe into the tripod base, put the newly painted end in first so you can't see it.
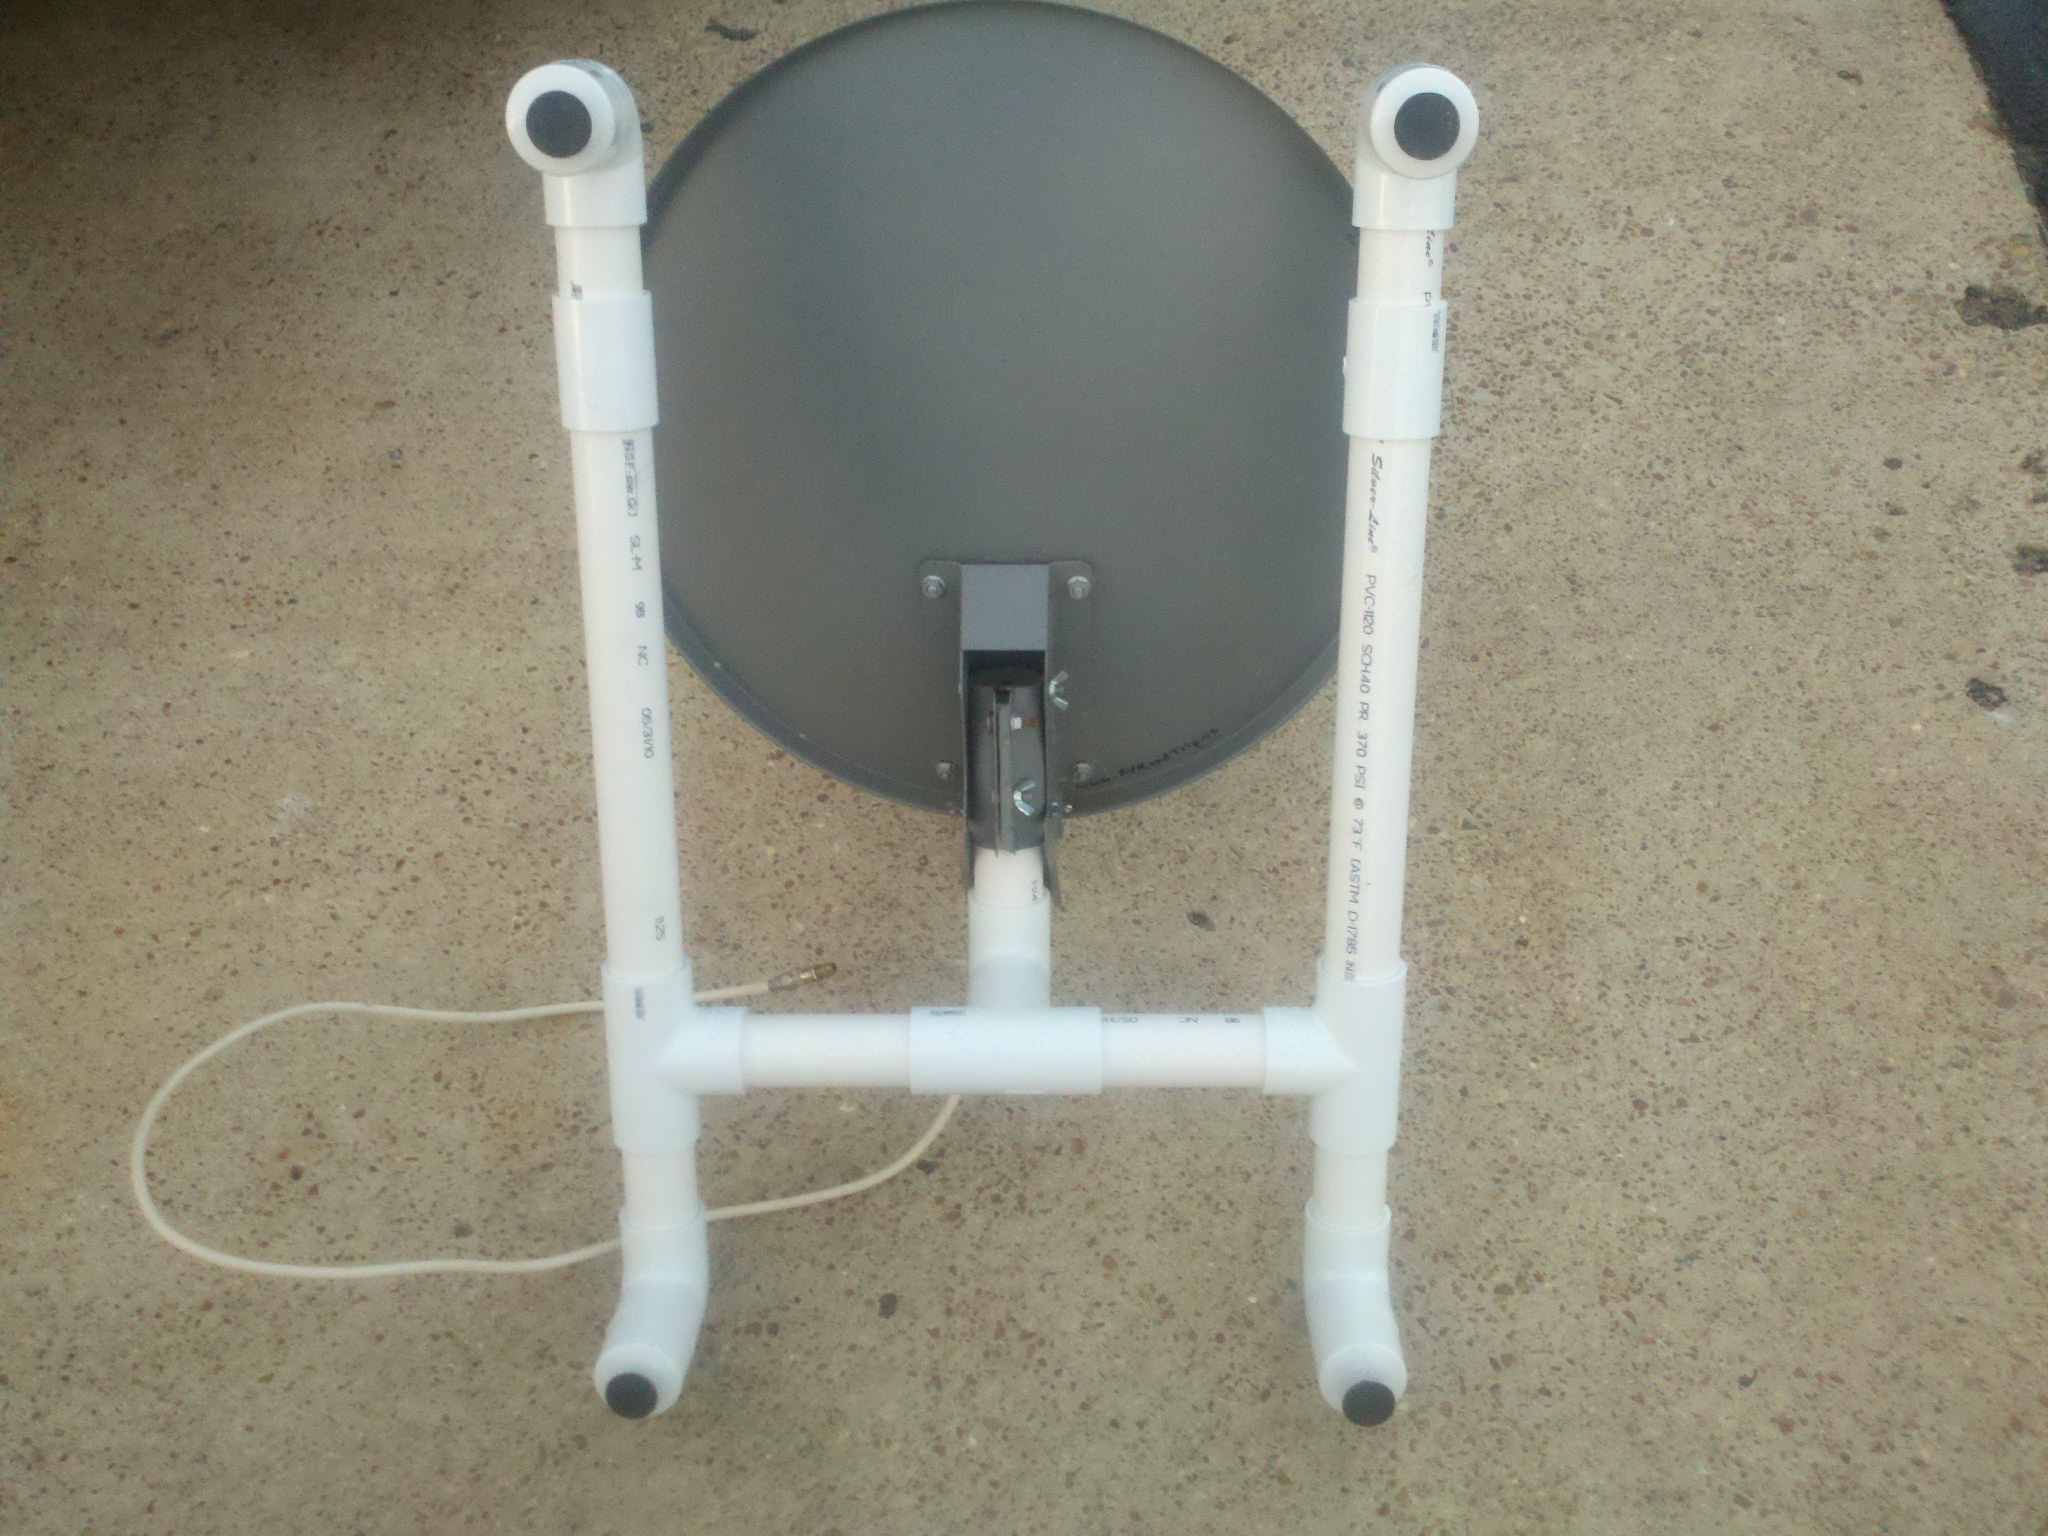
Now head to your local hardware store, Lowe's or Home Depot and go to the PVC section. We used 3/4" schedule 40 PVC but you really should use 1" PVC. 1" is simply sturdier. You will need the following parts:
- 4 each 3/4" 90° elbows
- 4 each 3/4" plugs
- 2 each 3/4" T connectors
- 1 each 3/4" + (plus) connector
- 57" of 3/4" Schedule 40 PVC
- 1 container of standard PVC glue
Total cost of the parts from your hardware store should run about $20 or so. Of course, prices will vary by location so don't be shocked if yours is more or less. If you don't have a common hacksaw, grab one while at the hardware store. The really simple one that is handheld and comes with one blade will do just fine. You'll also need three 3/4" screws and a screwdriver, make sure you have those as well.
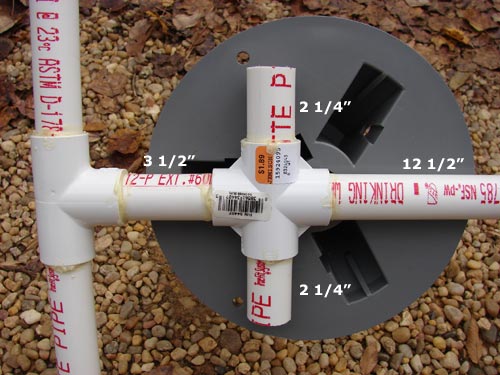
Now that you're back home and have all the parts and tools you need, let's get busy. Grab your length of 3/4" PVC pipe and cut the following lengths from it:
- 4 9" pieces
- 2 2-1/4" pieces
- 1 3-1/2" piece
- 1 12-1/2" piece
Your measurements don't have to be precise, just "close enough for government work". The leftover PVC length is great fun. Have your kids get on one end and you on the other then talk through it. Or stand on your front steps and yell "Ricola" through it. Take it into your pool and see if you can breathe through it. Oh the joy a piece of PVC brings to the world... :) Anyway, on with the project.
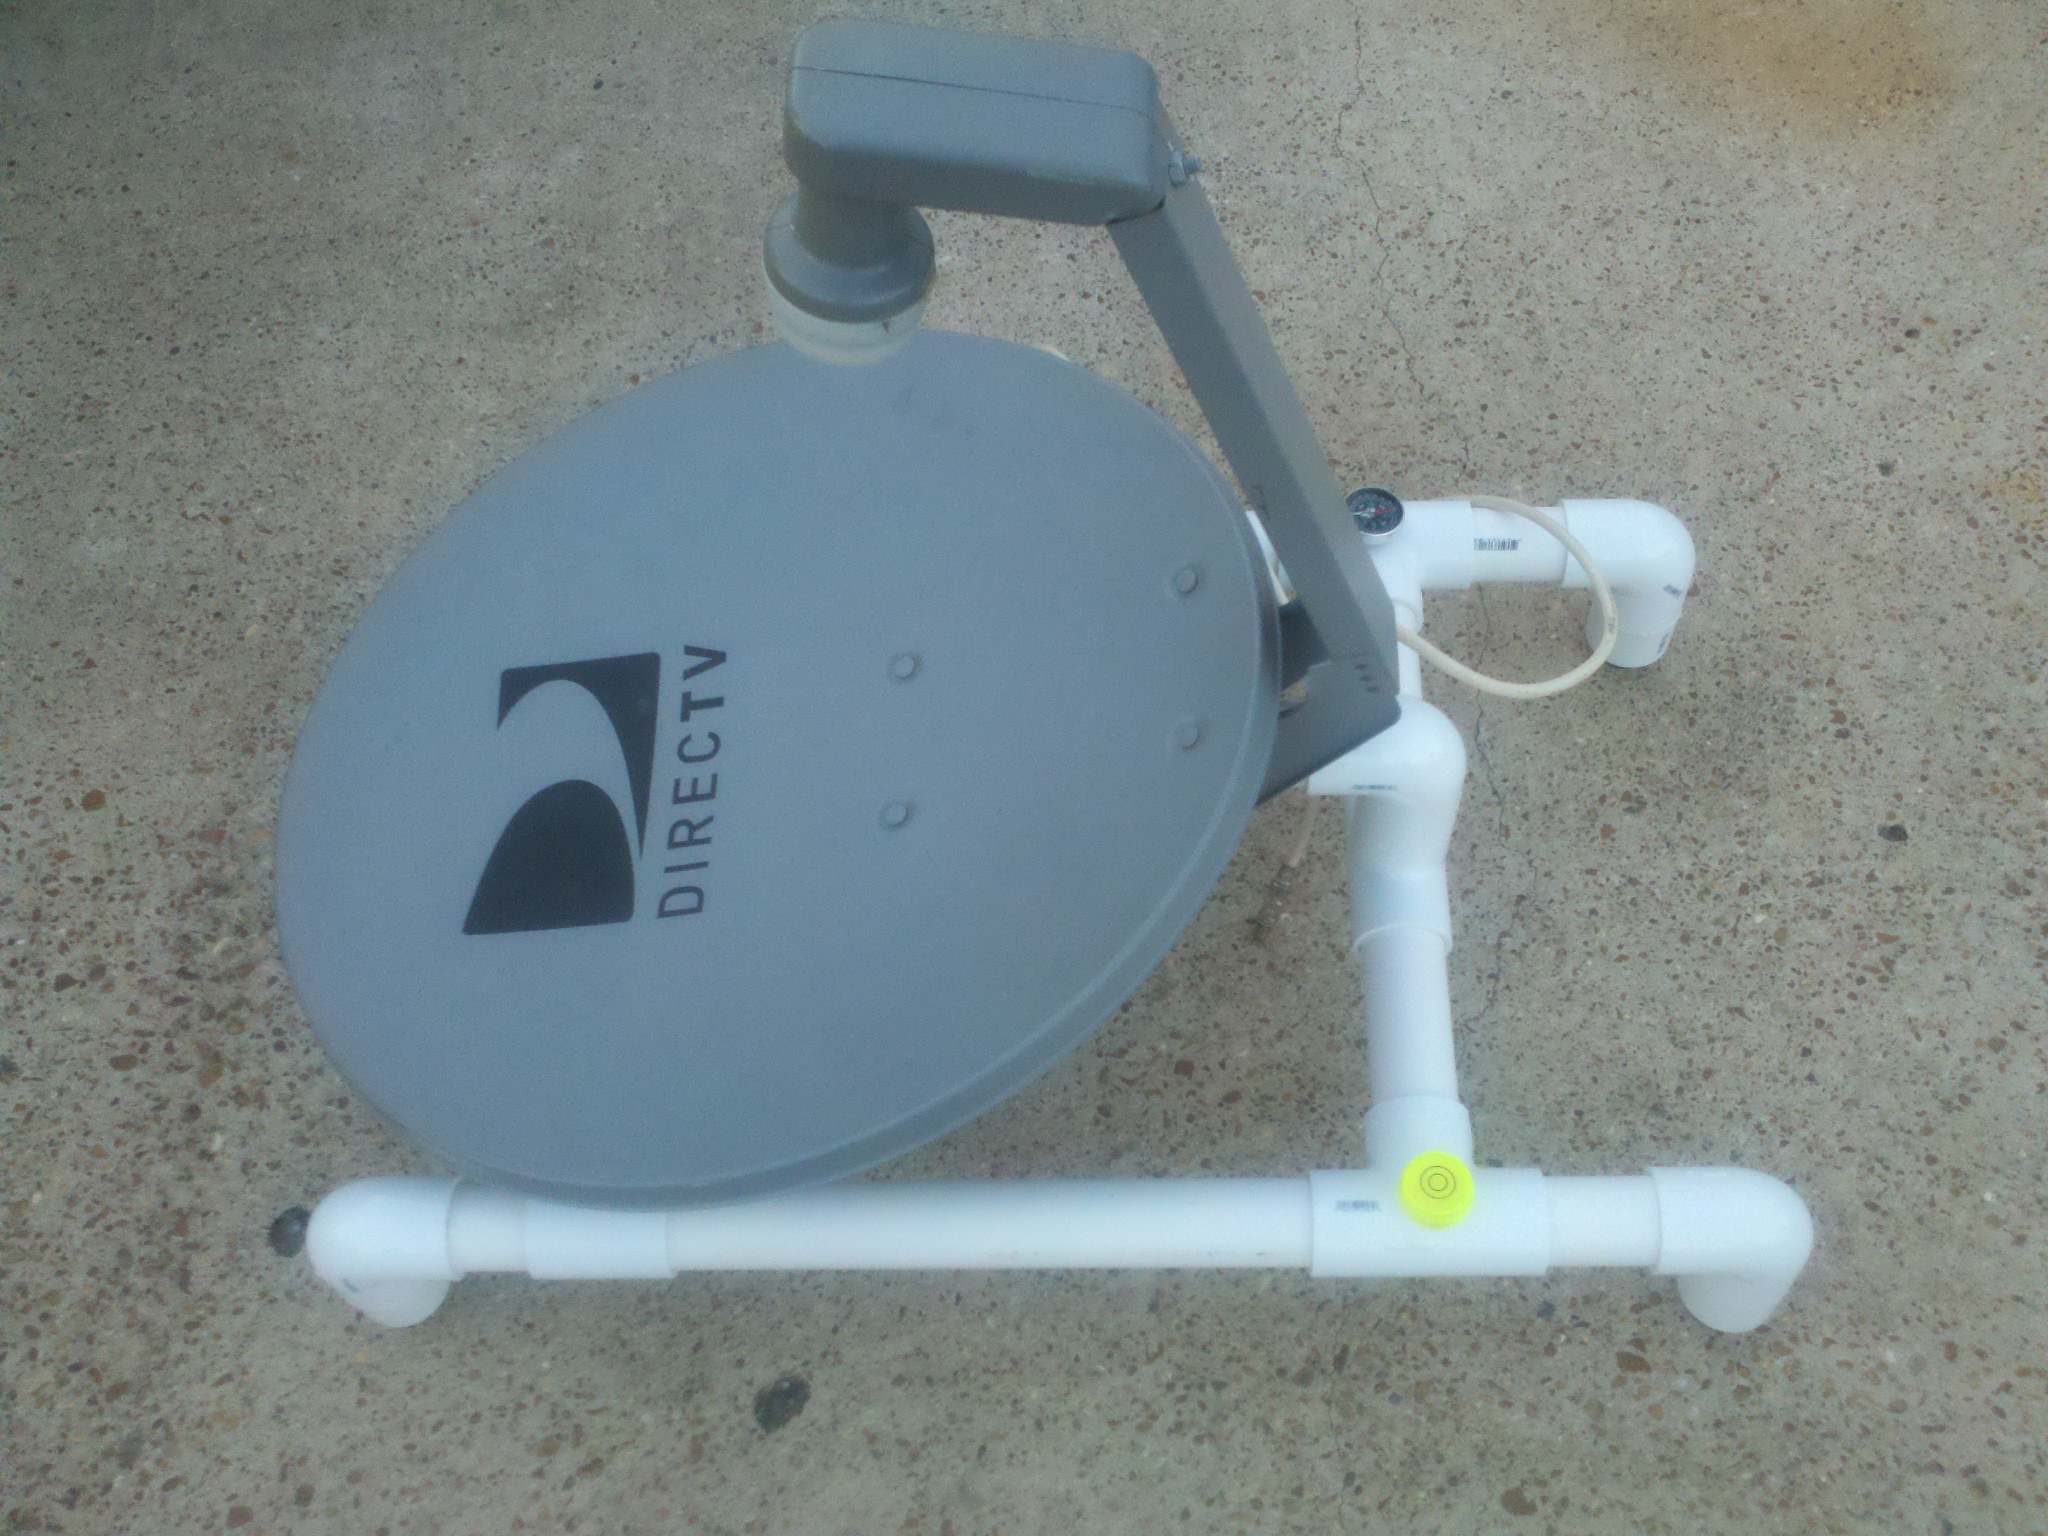
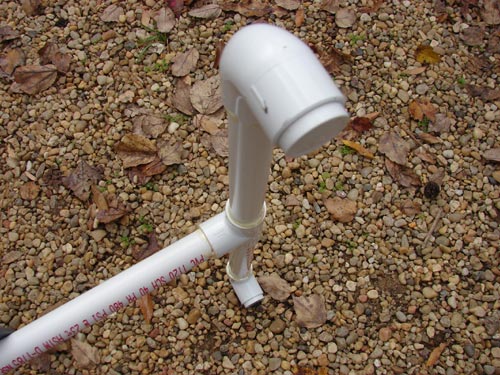
Now let's assemble all the PVC pieces. Here are a few pictures of what the finished product will look like, this lets you know where each piece of pipe and each connector will go. Once you glue the PVC together, it is permanent so make sure you have it right before gluing it. Place a T between 2 9" pieces. Attach a 90° elbow to each end and insert a plug into each elbow. Repeat for the other end. Insert the 12 1/2" piece and the 3 1/2" piece into opposite sides of the "plus" or "cross" connector. Insert the two 2 1/4" pieces into the other openings on the plus connector. Slide the T connectors from the other pieces onto the ends of the 3 1/2" piece and the 12 1/2" piece. See the pictures below if you get confused.
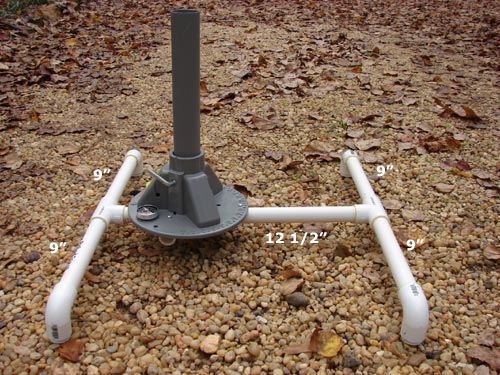
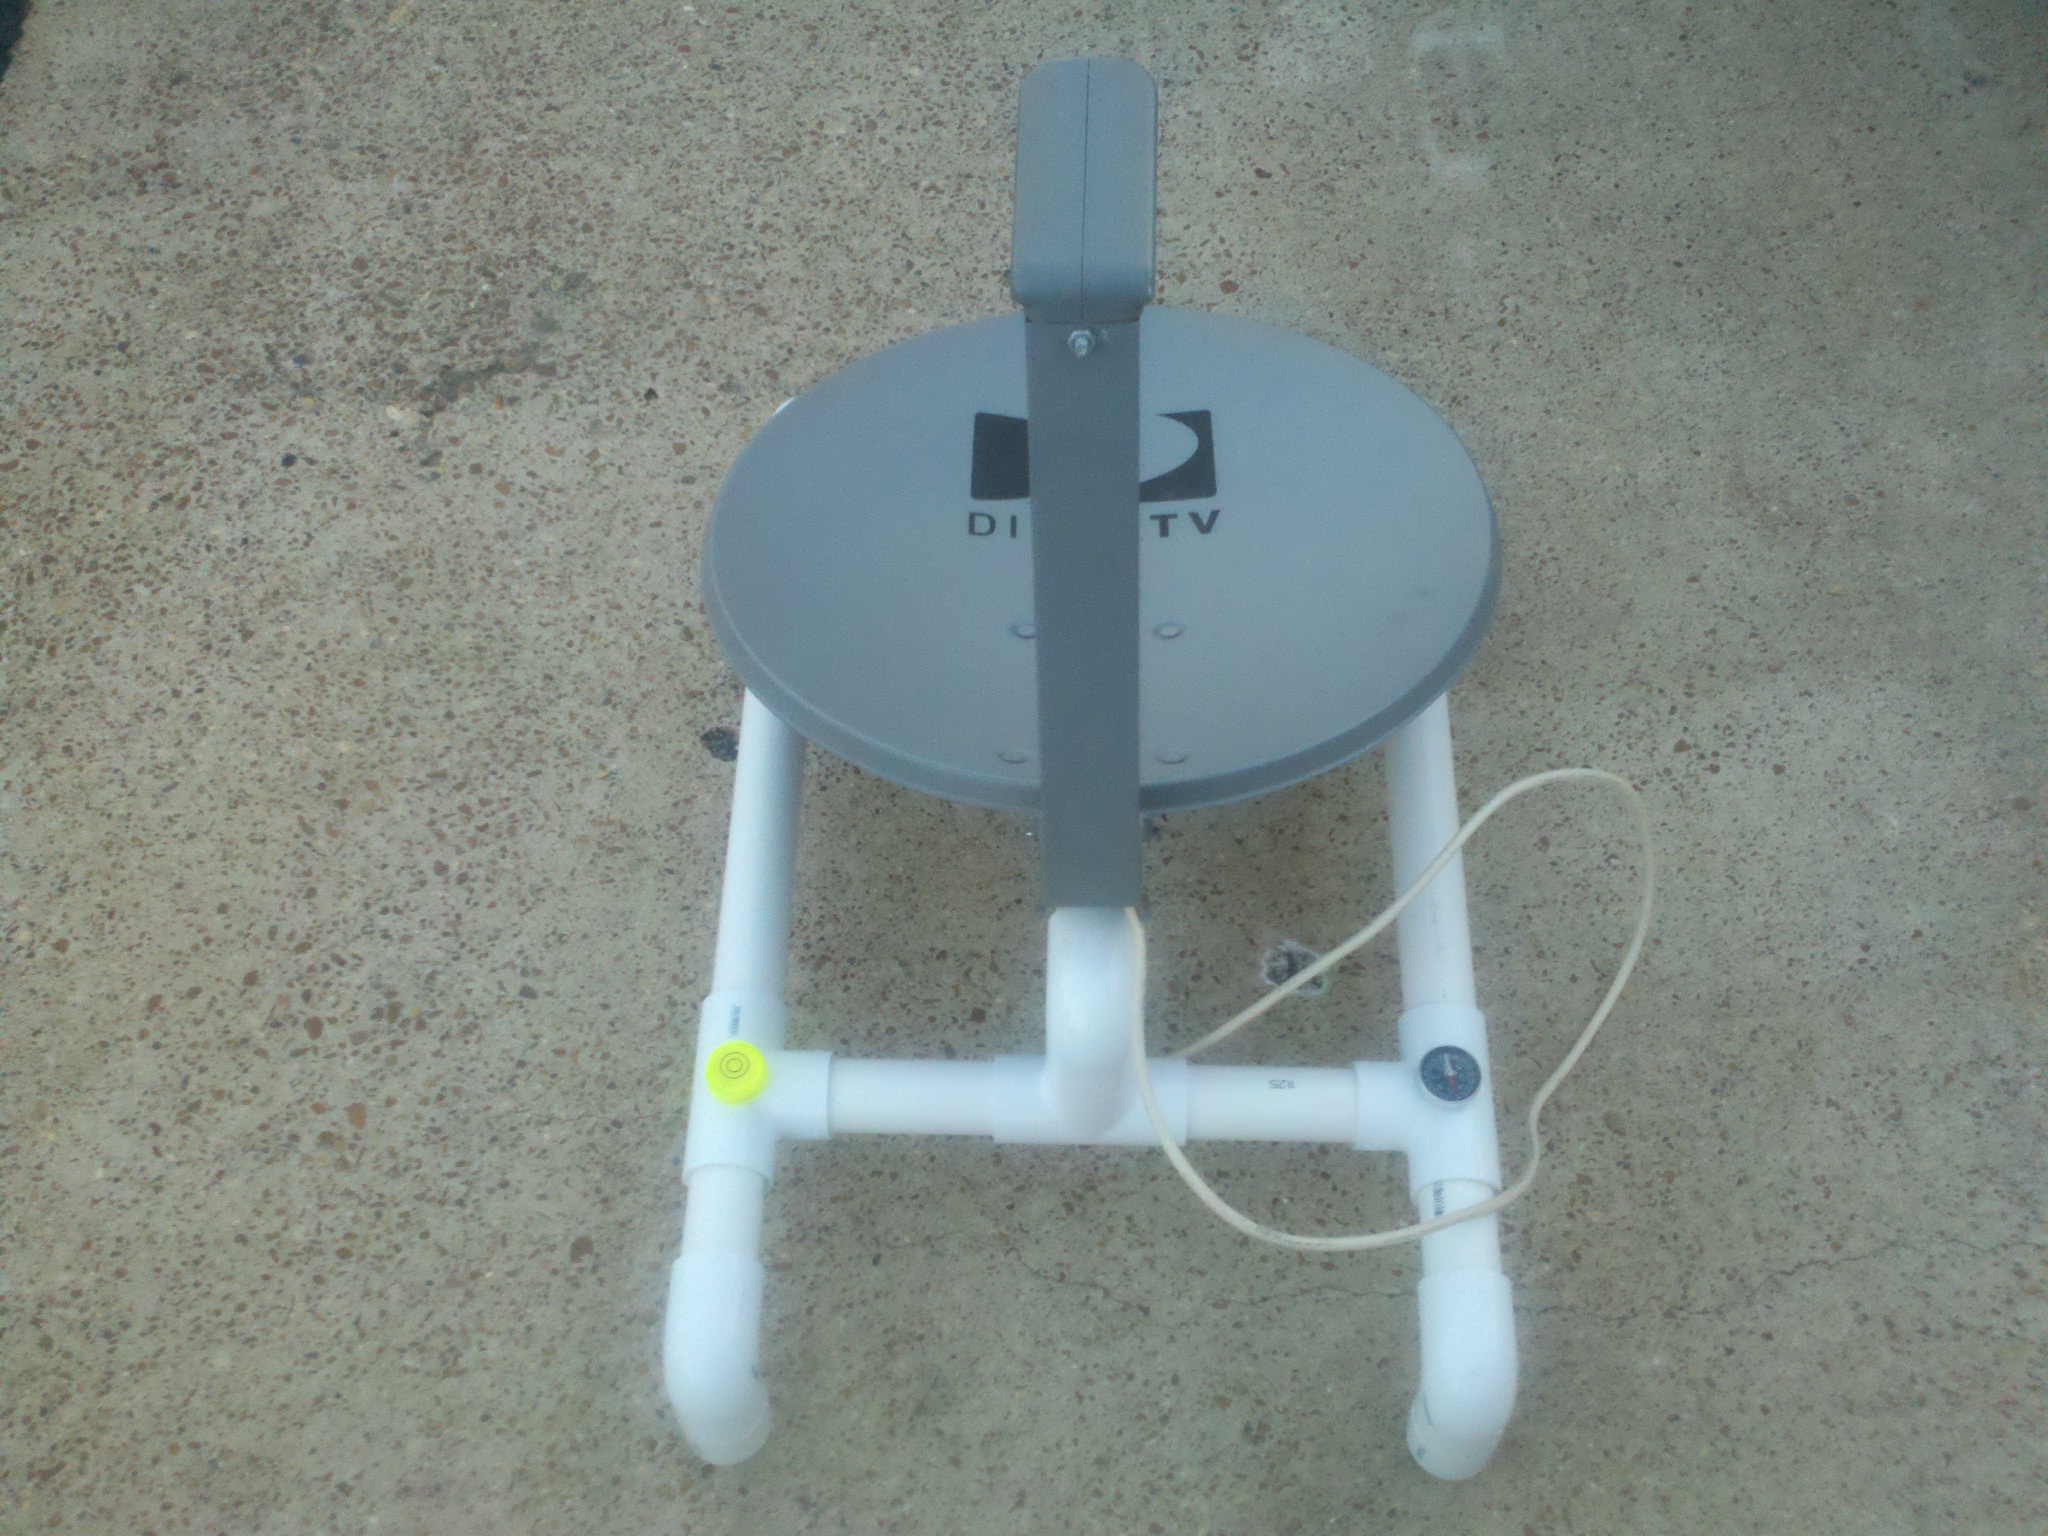
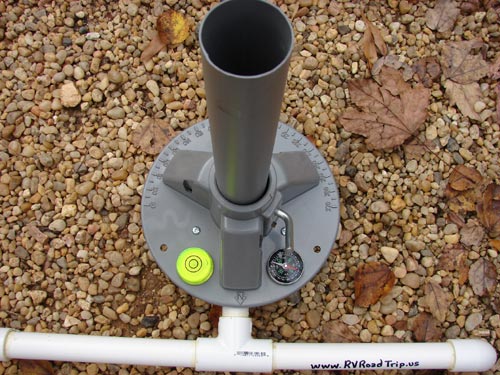
Now place the tripod on top of the plus connector so that the holes line up with the PVC. Mark at least 3 holes, one over each of the 2 1/4" pieces and one over the 12 1/2" piece. Now drill a 5/64" pilot hole where you marked. Place the tripod back into position and screw it down. Don't over tighten but make sure it is snug. The image below gives you an idea of where the screws will go. One is hidden from view by the pipe but you'll see the hole in the tripod base and easily know where it goes.
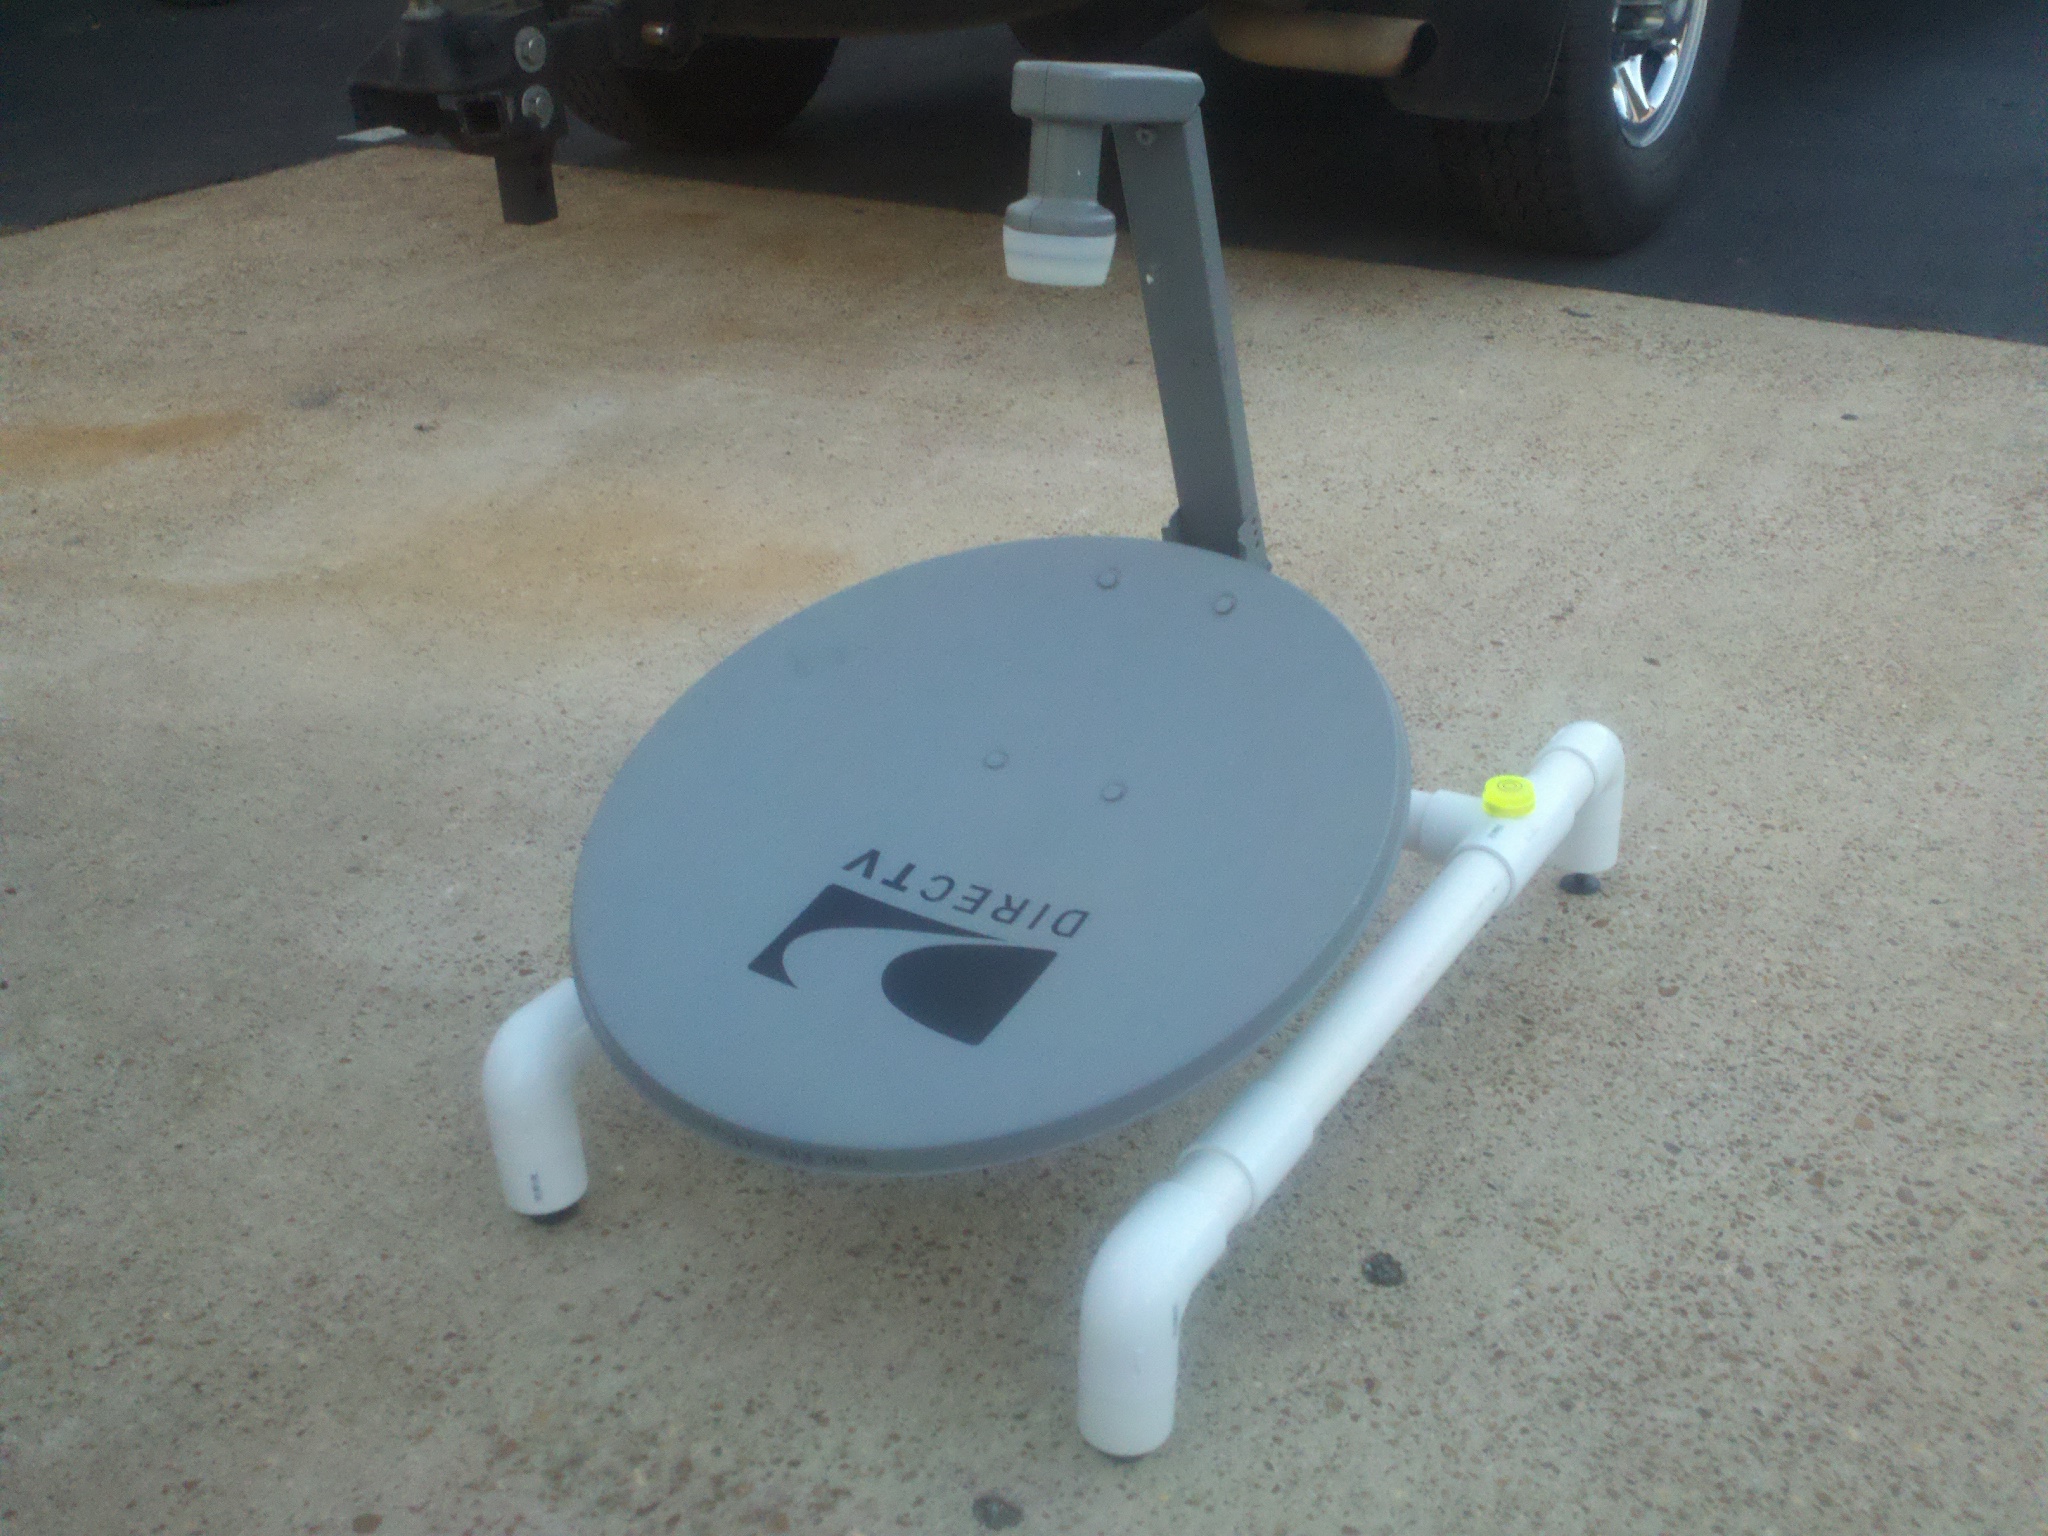
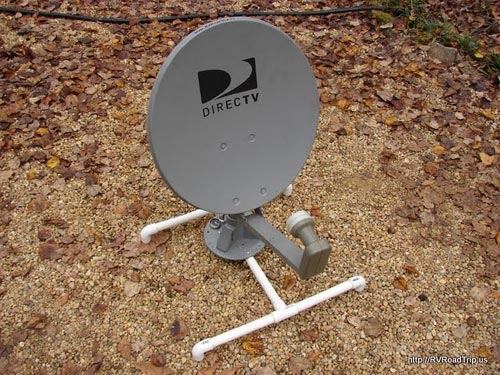
OK, everything is assembled, properly glued and the glue has dried (24 hours). Grab your dish and attach it to the pole. Replace the standard nuts on the dish with wing nuts so you can loosen and tighten them without needing tools. Congratulations, you just built a dish stand that is impossible to tip over under normal conditions. Tornadoes and hurricanes are not normal conditions, your camper will likely turn over before this stand does if you encounter either of those. Here is the finished product:
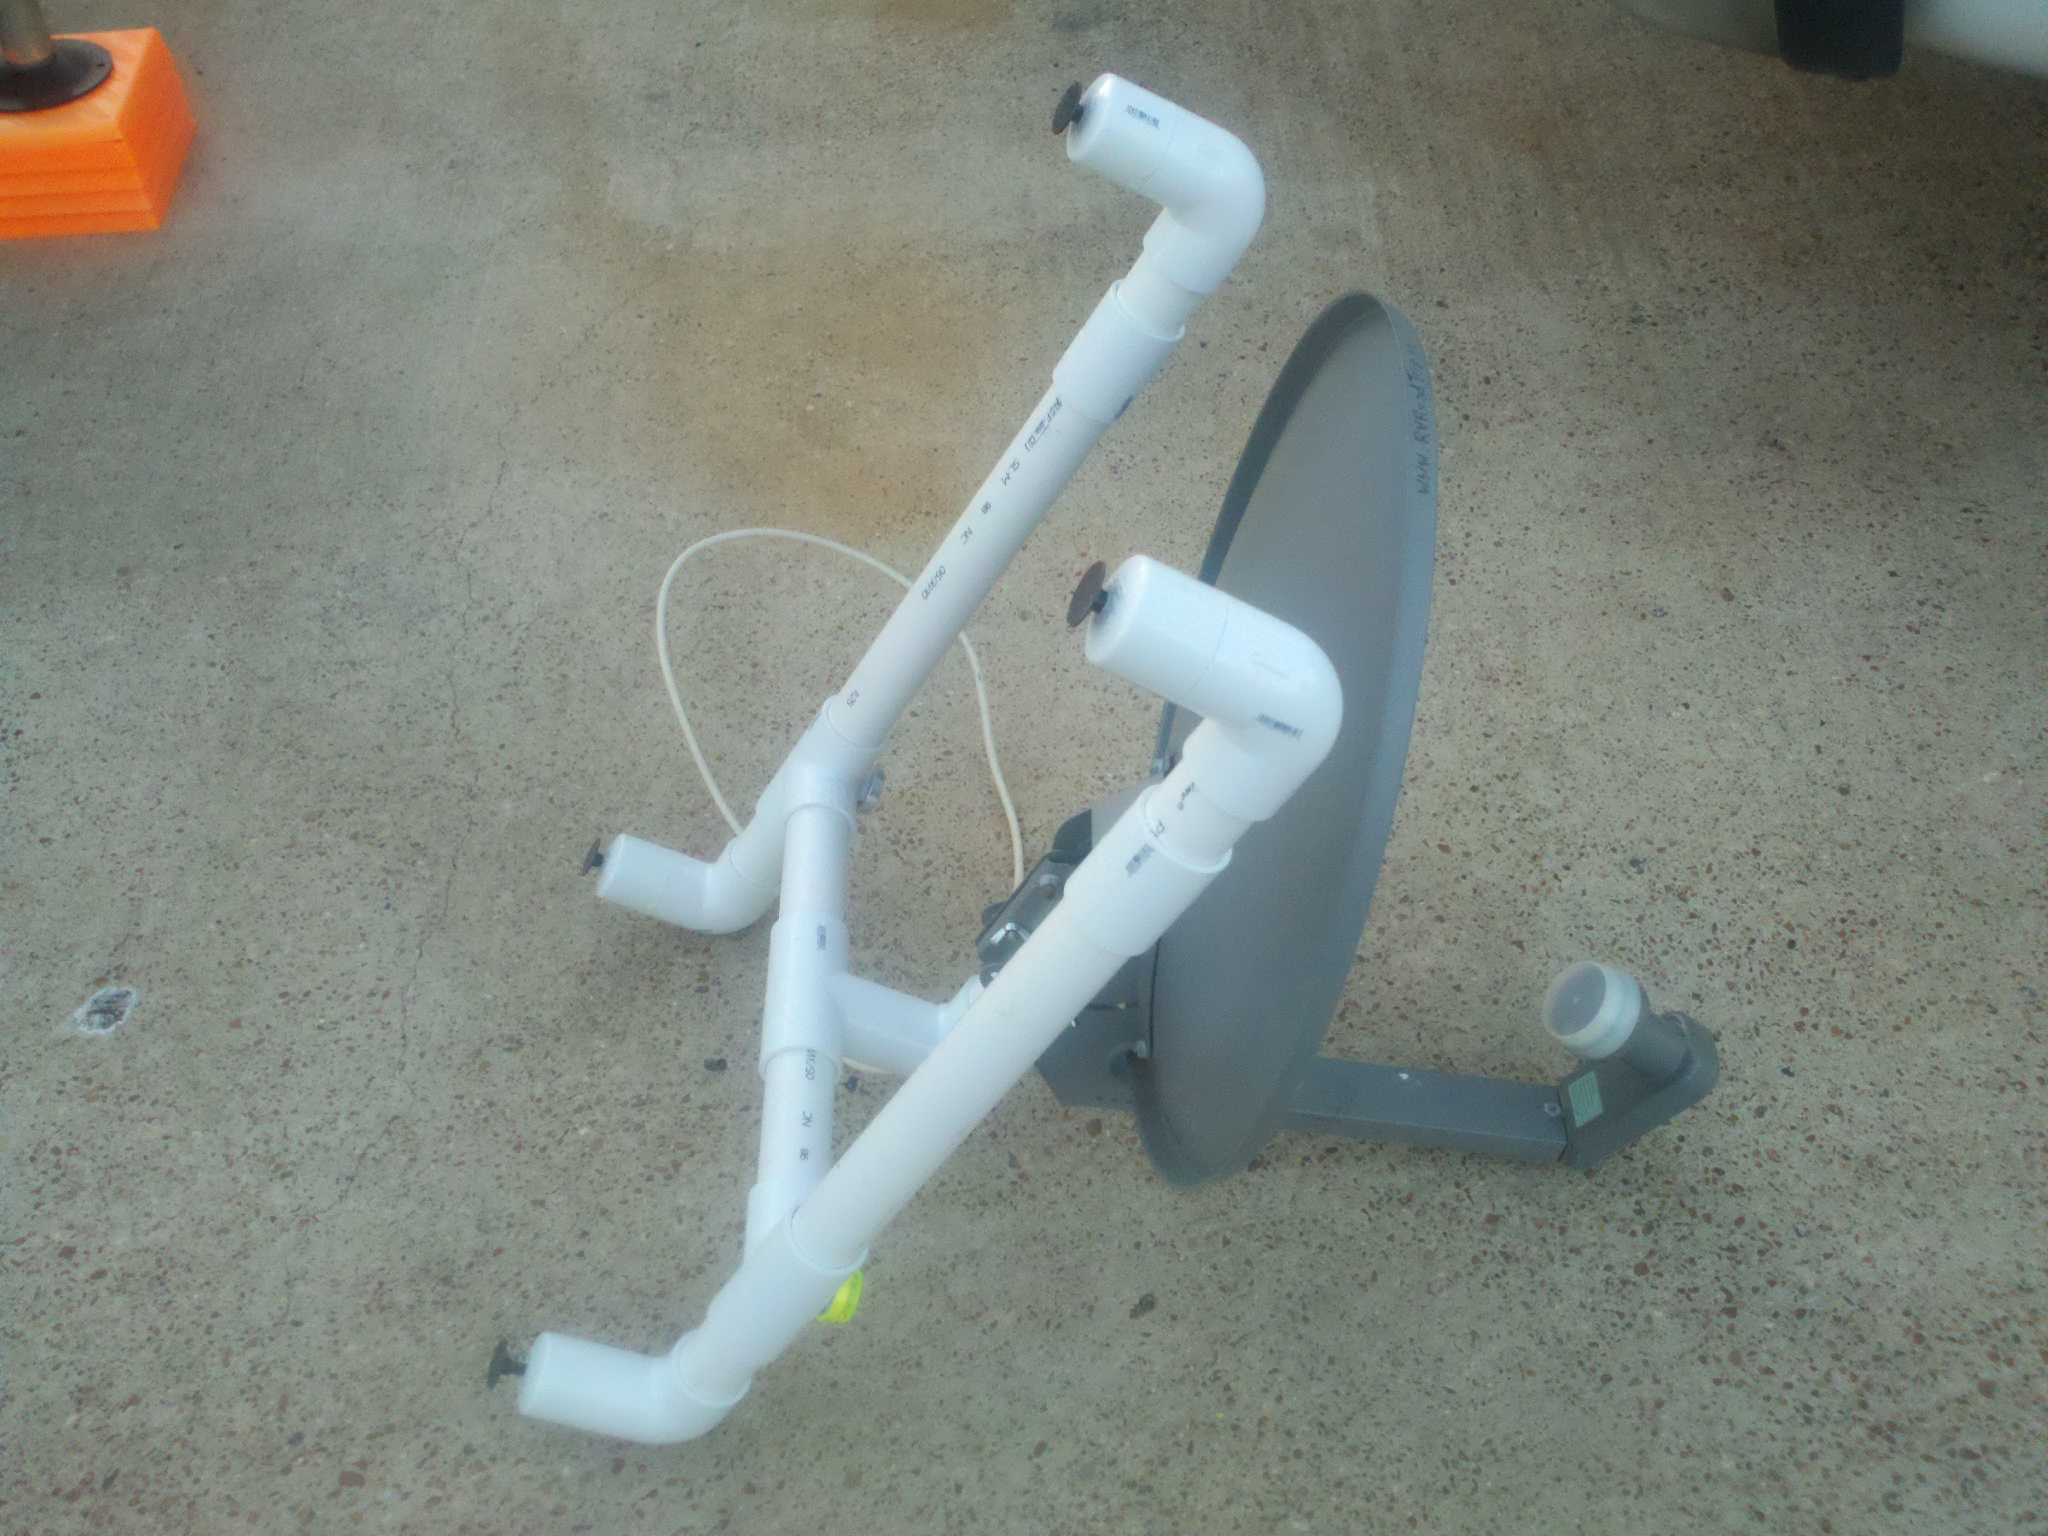
UPDATE: We decided to go with the flipped dish (upside down dish) as it is substantially easier to align when setting it up. We did not do a step by step guide on building this one, but here are pictures of it. You should be able to copy the design using these images.